

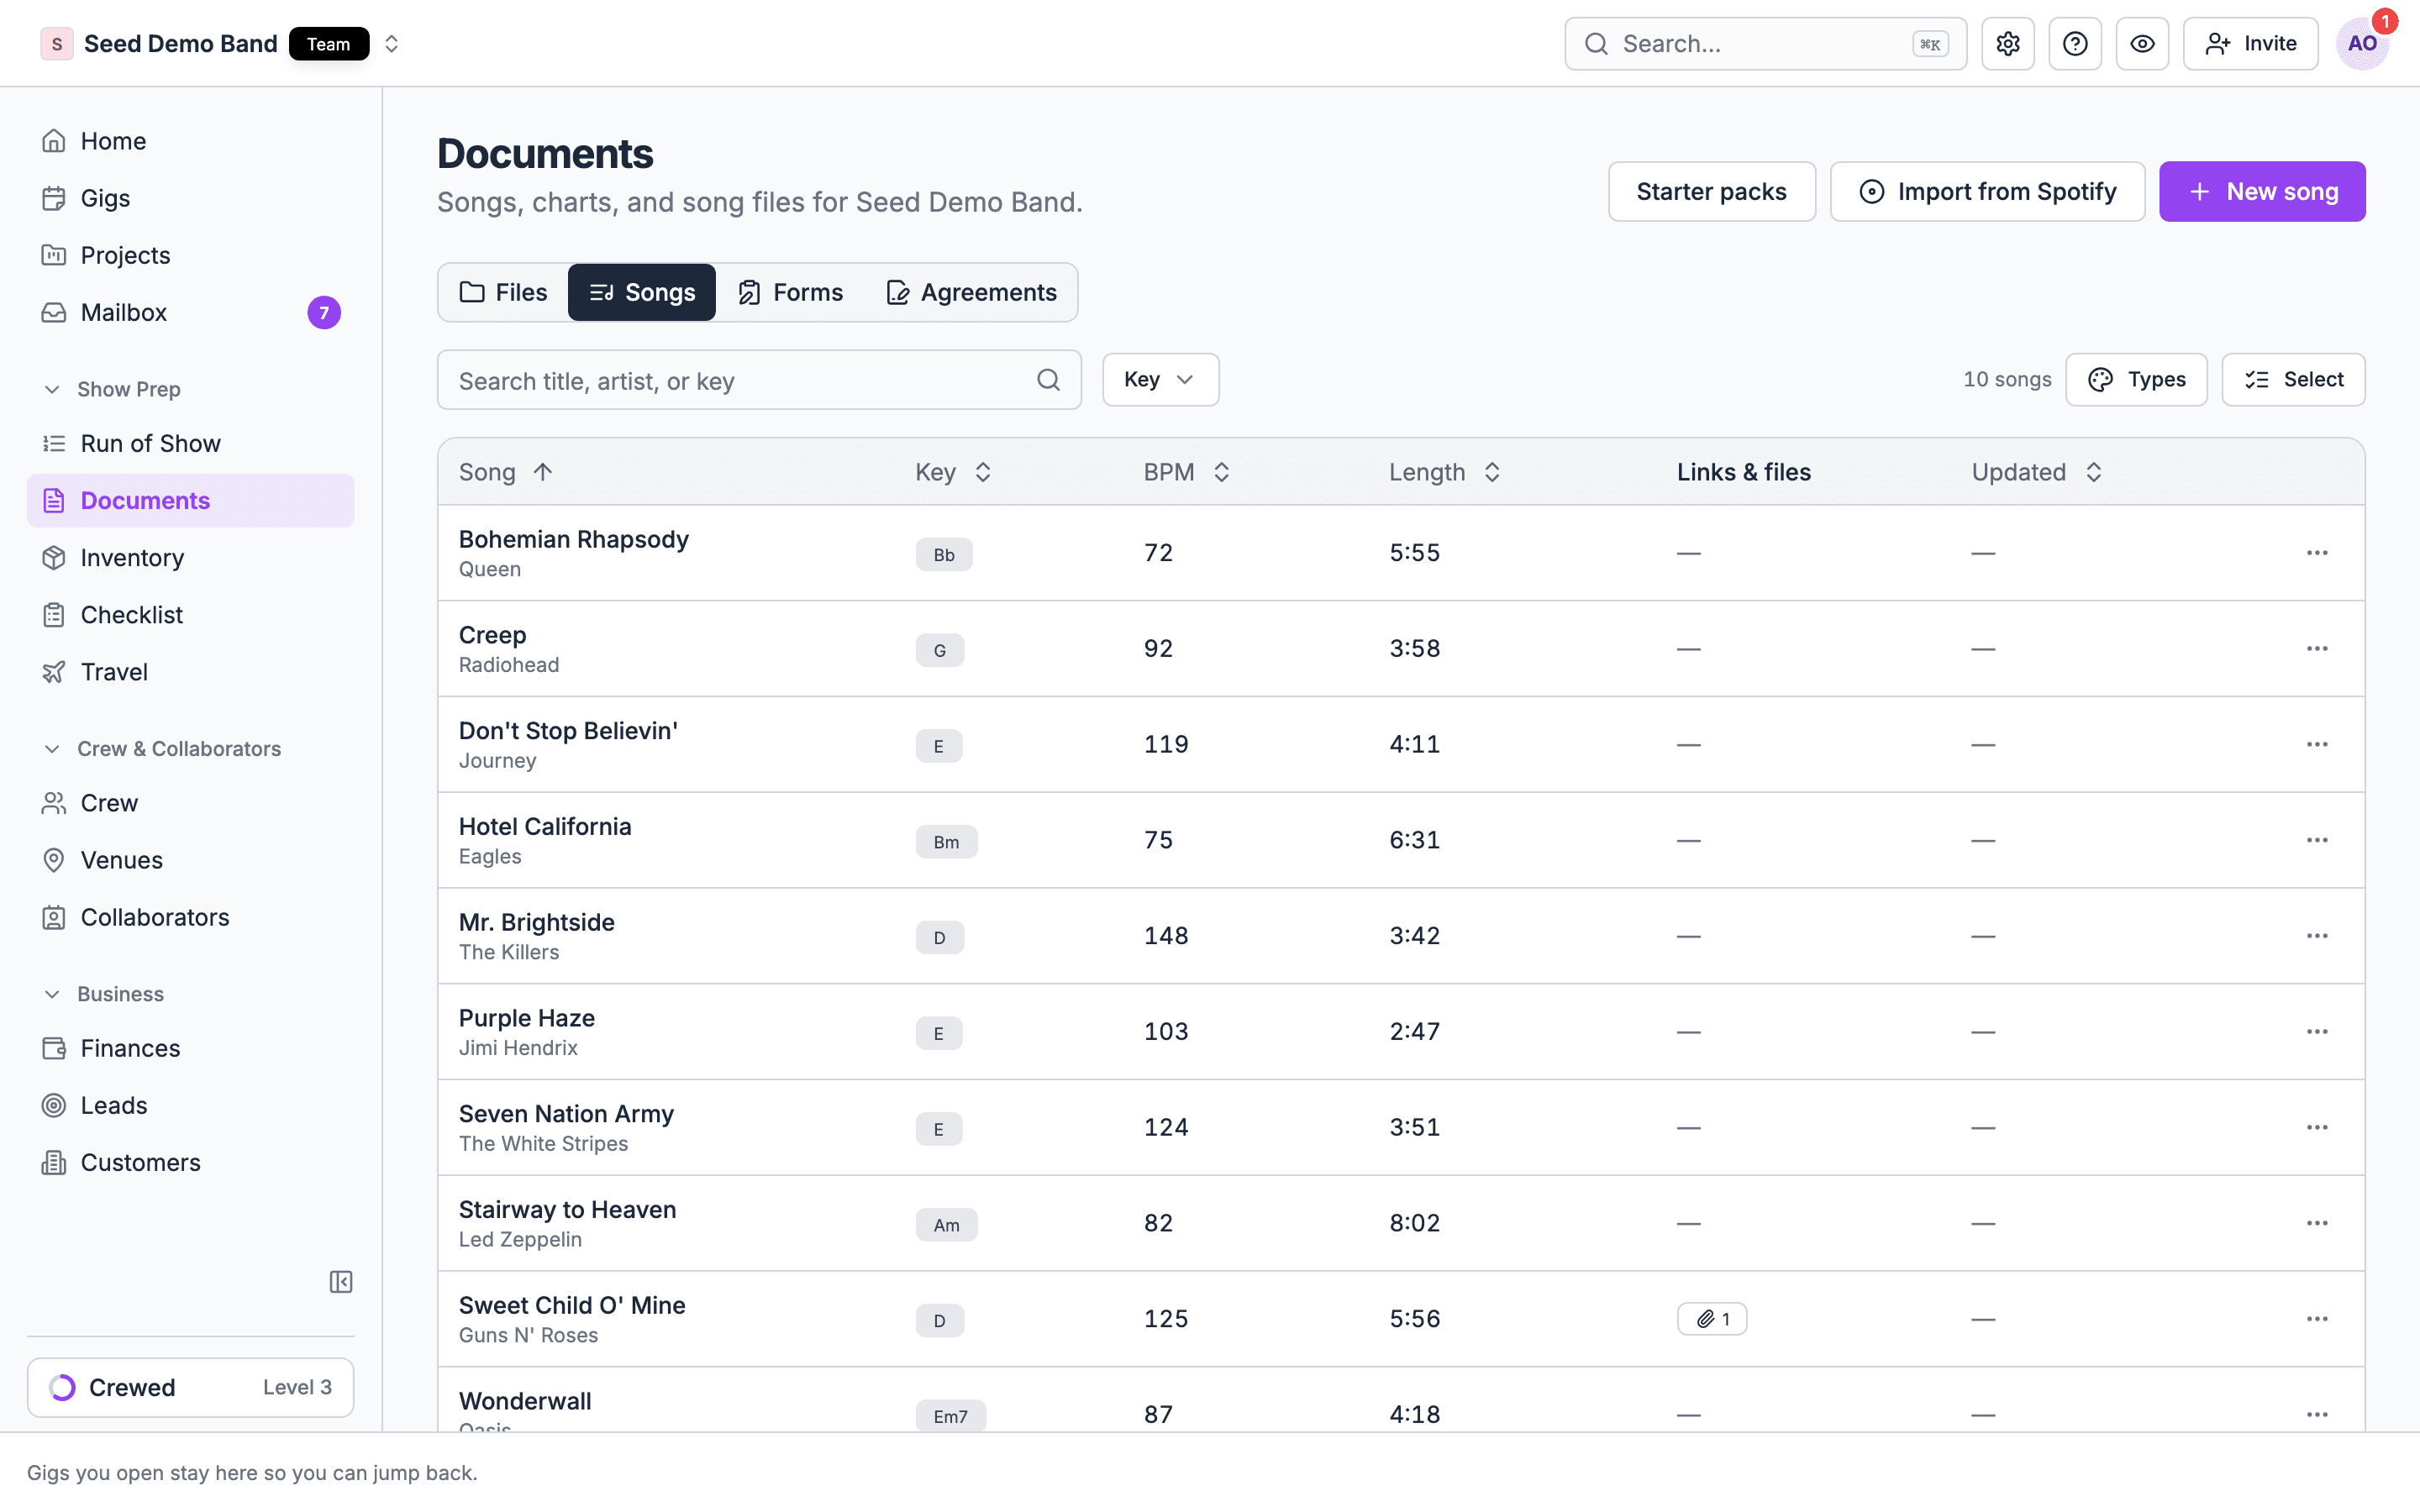
Opening the library
Go to Show prep → Documents in the sidebar and select Songs, or go straight to/assets?view=songs. The Songs button on the Setlists tab of the Run of Show page takes you there too. Older links to the old Setlists page’s song library tab open Documents → Songs.
Owners, admins and gig coordinators manage the song library. Gig coordinators, who don’t manage organization files, open Documents straight to Songs.
The library stays in Documents → Songs after your organization switches to Run of Show.
The library table
Each song is one row with these columns:
Click a column header (Song, Type, Acts, Key, BPM, Length or Updated) to sort by it.
Click a song to open its details on the side: Artist, Key, Tempo, Length, Files, the Setlists it’s in, and when it was updated. From there choose Edit song, view its files, or delete it. The row’s Actions menu has Edit song, View files and Delete too.
Adding a song
On an empty library, choose Add your first song or Start from a pack. Otherwise, choose New song at the top of Documents → Songs. For a quick add, enter the title, add the artist if you like, and save. The song is ready for setlists right away, and you can fill in the rest later. For a complete entry, fill in whichever fields apply:
If a duration or tempo is out of range or malformed, the form shows the problem under the field, and you can’t save until you fix or clear it.
Filling a song from a streaming service
Type in Find a song and choose Find. Soundcheck searches Spotify, Apple Music and SoundCloud together, wherever your workspace has them, and labels where each result comes from. Pick one to fill in the title, artist and duration (when the service has one) and add the link as a media link. You can also paste a single song link from any of those services. For whole albums and other bulk adds, see Adding songs in bulk.Media links
Attach resources to help your team prepare and perform. Each link has a type:
To add one, open the song for editing and go to Media Links. Under Add New Media Link, choose a type, enter the URL, add a title if you like, and choose Add Link. Then save the song.
Links to Spotify, Apple Music, YouTube, SoundCloud, Bandcamp and TIDAL show as that service’s icon next to the song in the library, on setlists and in the run of show. Click an icon to open the link in a new tab. Other links show a plain link icon.
Media links point to files hosted elsewhere, such as Google Drive, Dropbox, YouTube or SoundCloud.
Files on a song
A song can also carry uploaded files, such as a chart PDF. You can file a song’s attachments into Documents folders. Filing the song itself into a folder isn’t supported yet. A gig’s Documents tab lists song attachments under Attachments. See Works with.Finding songs
Type in Search title, artist, or key to find songs. Narrow the list with the filters:- Type, including No type. Shows once your organization has song types.
- Act. Shows once your organization has acts.
- Key, such as only songs in C, or songs with no key set.
Song types
Song types group songs by when you play them, such as First dance or Dinner. Each has a colour that shows next to the song in the library, on setlists, in the run of show on the web and in the mobile app, and in the run of show PDF. Choose Types in the library toolbar to manage them. See Song types.Tagging songs to acts
If your organization has acts, tag each song with the acts that play them under Acts when you add or edit it. A set that names an act then offers that act’s songs in its picker. See Acts and songs.Changing many songs at once
Choose Select in the toolbar, tick songs (or tick the header box to select every song on the page), then use the bar at the bottom:- Set type gives every selected song a type, or No type clears it. It shows once your organization has song types.
- Delete removes every selected song. The confirmation names the setlists that use them before you confirm.
Editing and deleting songs
To change a song, click it and choose Edit song, make your changes, and choose Save Changes. Changes apply everywhere the song is used. Editing a song cell on a saved setlist also saves to the library. To delete a song, choose Delete from its menu or details. The confirmation lists the setlists that use it, such as “Used in 2 setlists: Friday Show, Wedding reception. Deleting removes it from them.” If Soundcheck can’t check, it says so. Confirm with Delete song.Keeping the library in shape
- Be consistent with titles. “Don’t Stop Believin’” every time, not three spellings. Consistent names make songs easy to find and avoid duplicates.
- Note your key, not the original. If your band plays a song in a different key, enter yours.
- Keep it current. Update durations when arrangements change, add songs as you learn them, and check that media links still open.
- Share the work. Several people can add and edit songs at once, so split up a big first build.
Related
Adding songs in bulk
Starter packs, Spotify and spreadsheets.
Building saved setlists
Put library songs into reusable setlists.
Setlists
Start here.