

Before you start
- Give sections a track. The Schedule arranges the day by track (Production, Performance, Vendors, Hospitality and so on). Sections without a track share one Schedule row or lane.
- Add the acts to the gig. Each act on the gig gets its own lane on Tracks, which is where sets live.
- Set the gig’s date. Times are placed on the gig’s days. Without a date there’s nothing to place them on.
Editing on the Tracks layout
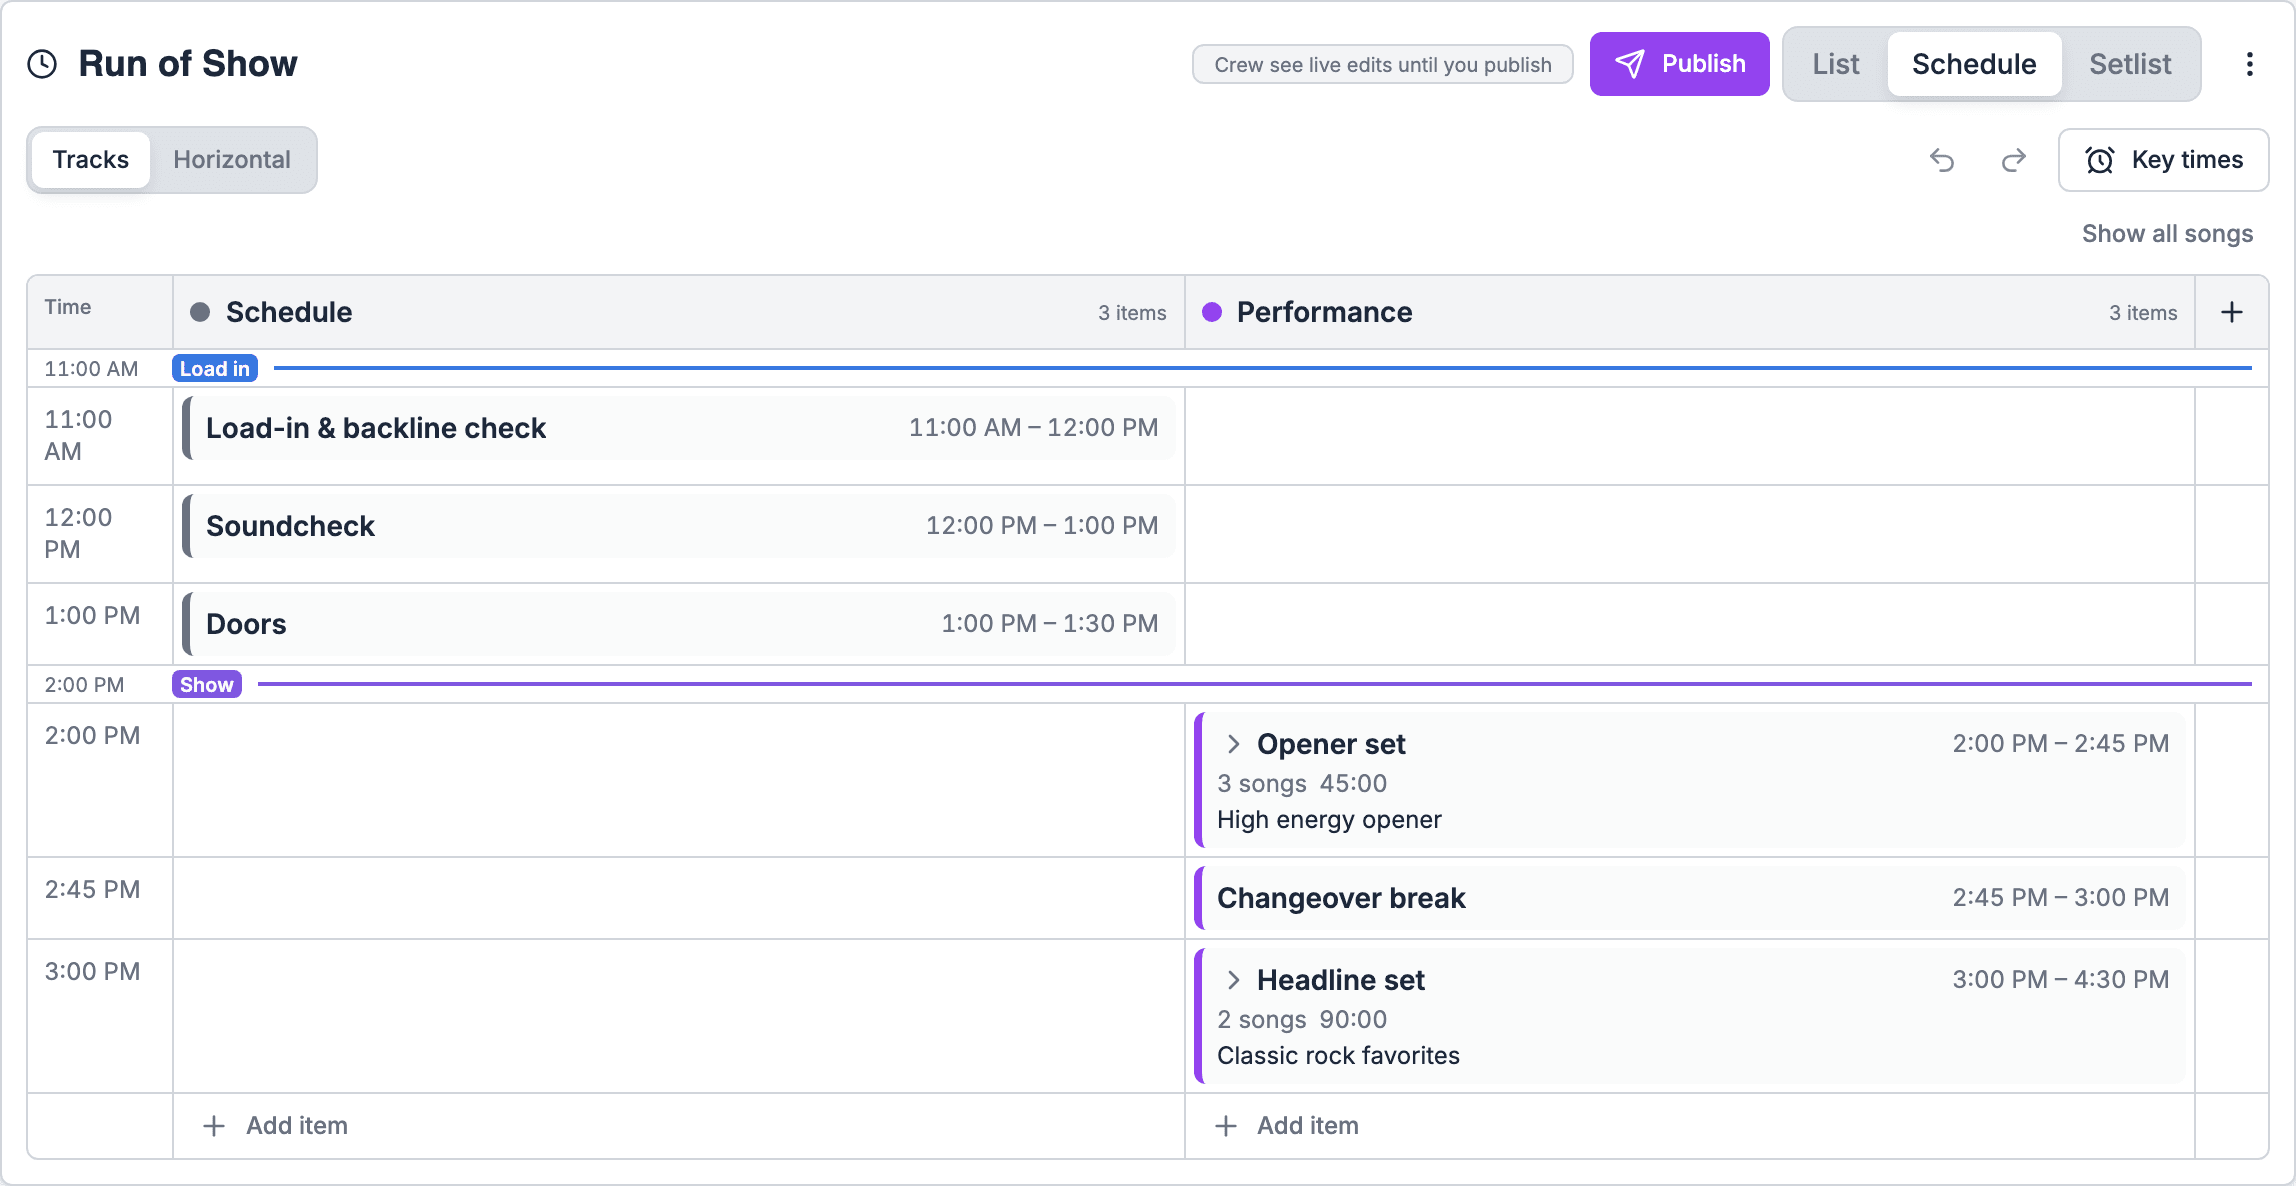
Tracks shows times down the side and one lane per track and per act across.Add an item at a time
1
Find the time and lane
Hover an empty cell in a timed row, or focus it with the keyboard.
2
Add it
Choose Add item. The new item starts at that row’s time in that lane.
3
Fill it in
The item opens in the side sheet. Name it and add its details.
Add a section
Choose + (Add section) at the end of the lane headers and pick a track. The track list is fixed: Production, Performance, Vendors, Hospitality, Front of house, Security, Travel, Ceremony & program, and Guests. You can’t add a track or rename one. For a lane with its own name, such as a DJ or a second band, pick the act on the item instead: each act on the gig gets its own lane. See Act lanes.Act lanes
An item sits in an act’s lane when:- the act is picked on the item, or
- the item or its section has a lineup label that matches the act’s name.
- Add set adds an empty set after the lane’s last item.
- Add item adds an item after the lane’s last item.
- Add songs. The act’s songs come first, then the rest of the library.
- Drag a song to reorder it.
- Remove a song.
- Add a moment after this song splits the set at that song, for a first dance or a toast in the middle of a set. The songs before stay in the set. The moment becomes its own item with its own time. The songs after continue in a second set marked (cont.).
- Move the song to another set.
Editing on the Horizontal layout
Horizontal shows items as bars on a time grid.Dragging and links
If items are linked, dragging one bar to another section or track breaks its links instead of moving the whole chain.The side sheet
Click an item on either layout to open it in the side sheet. From there you can set:- Title. Turn on Song set to make the item a set of songs. Press Enter in the title to add the next item.
- Start and Length. An item without a start time follows the previous item.
- Notes and cue details such as timing, playback and speakers.
- Key time, to make the item one of the gig’s key times. See Key times in the run of show.
- People. See People and assignments.
- On a song item, the set’s songs: add, remove and reorder them in the sheet, or choose Use a saved setlist to fill the item from a setlist in your library. See Setlists.
The side sheets no longer have a Color field or a Who sees it field. A section’s colour comes from its key time, or from its position when it has none. Who sees an item comes from its assignments.
Shortcuts
Worked example: a production day
1
Lay out the tracks
Choose Add section and add a Production section and a Performance section.
2
Block the production day
On Horizontal, drag across 12 PM to 3 PM in the Production row for Load in, then 3 PM to 4:30 PM for Line check.
3
Mark the key moments
Open Load in in the side sheet and pick Load in under Key time. Its row takes the Load in colour, and the gig’s Load in time follows the item when you move it.
4
Add the show
In the Performance row, add Doors at 7 PM and the band’s sets after it. Switch to Tracks to see both teams side by side.
5
Absorb a delay
The truck is late. Drag the right edge of Load in 30 minutes later. Everything after it that day moves with it.
Related
Views and filters
How to read each view.
Linking and timing
Segues, groups and shifting times.
Setlists
Sets inside the run of show.