

Submit an expense
- Web
- Mobile app
1
Open My Expenses
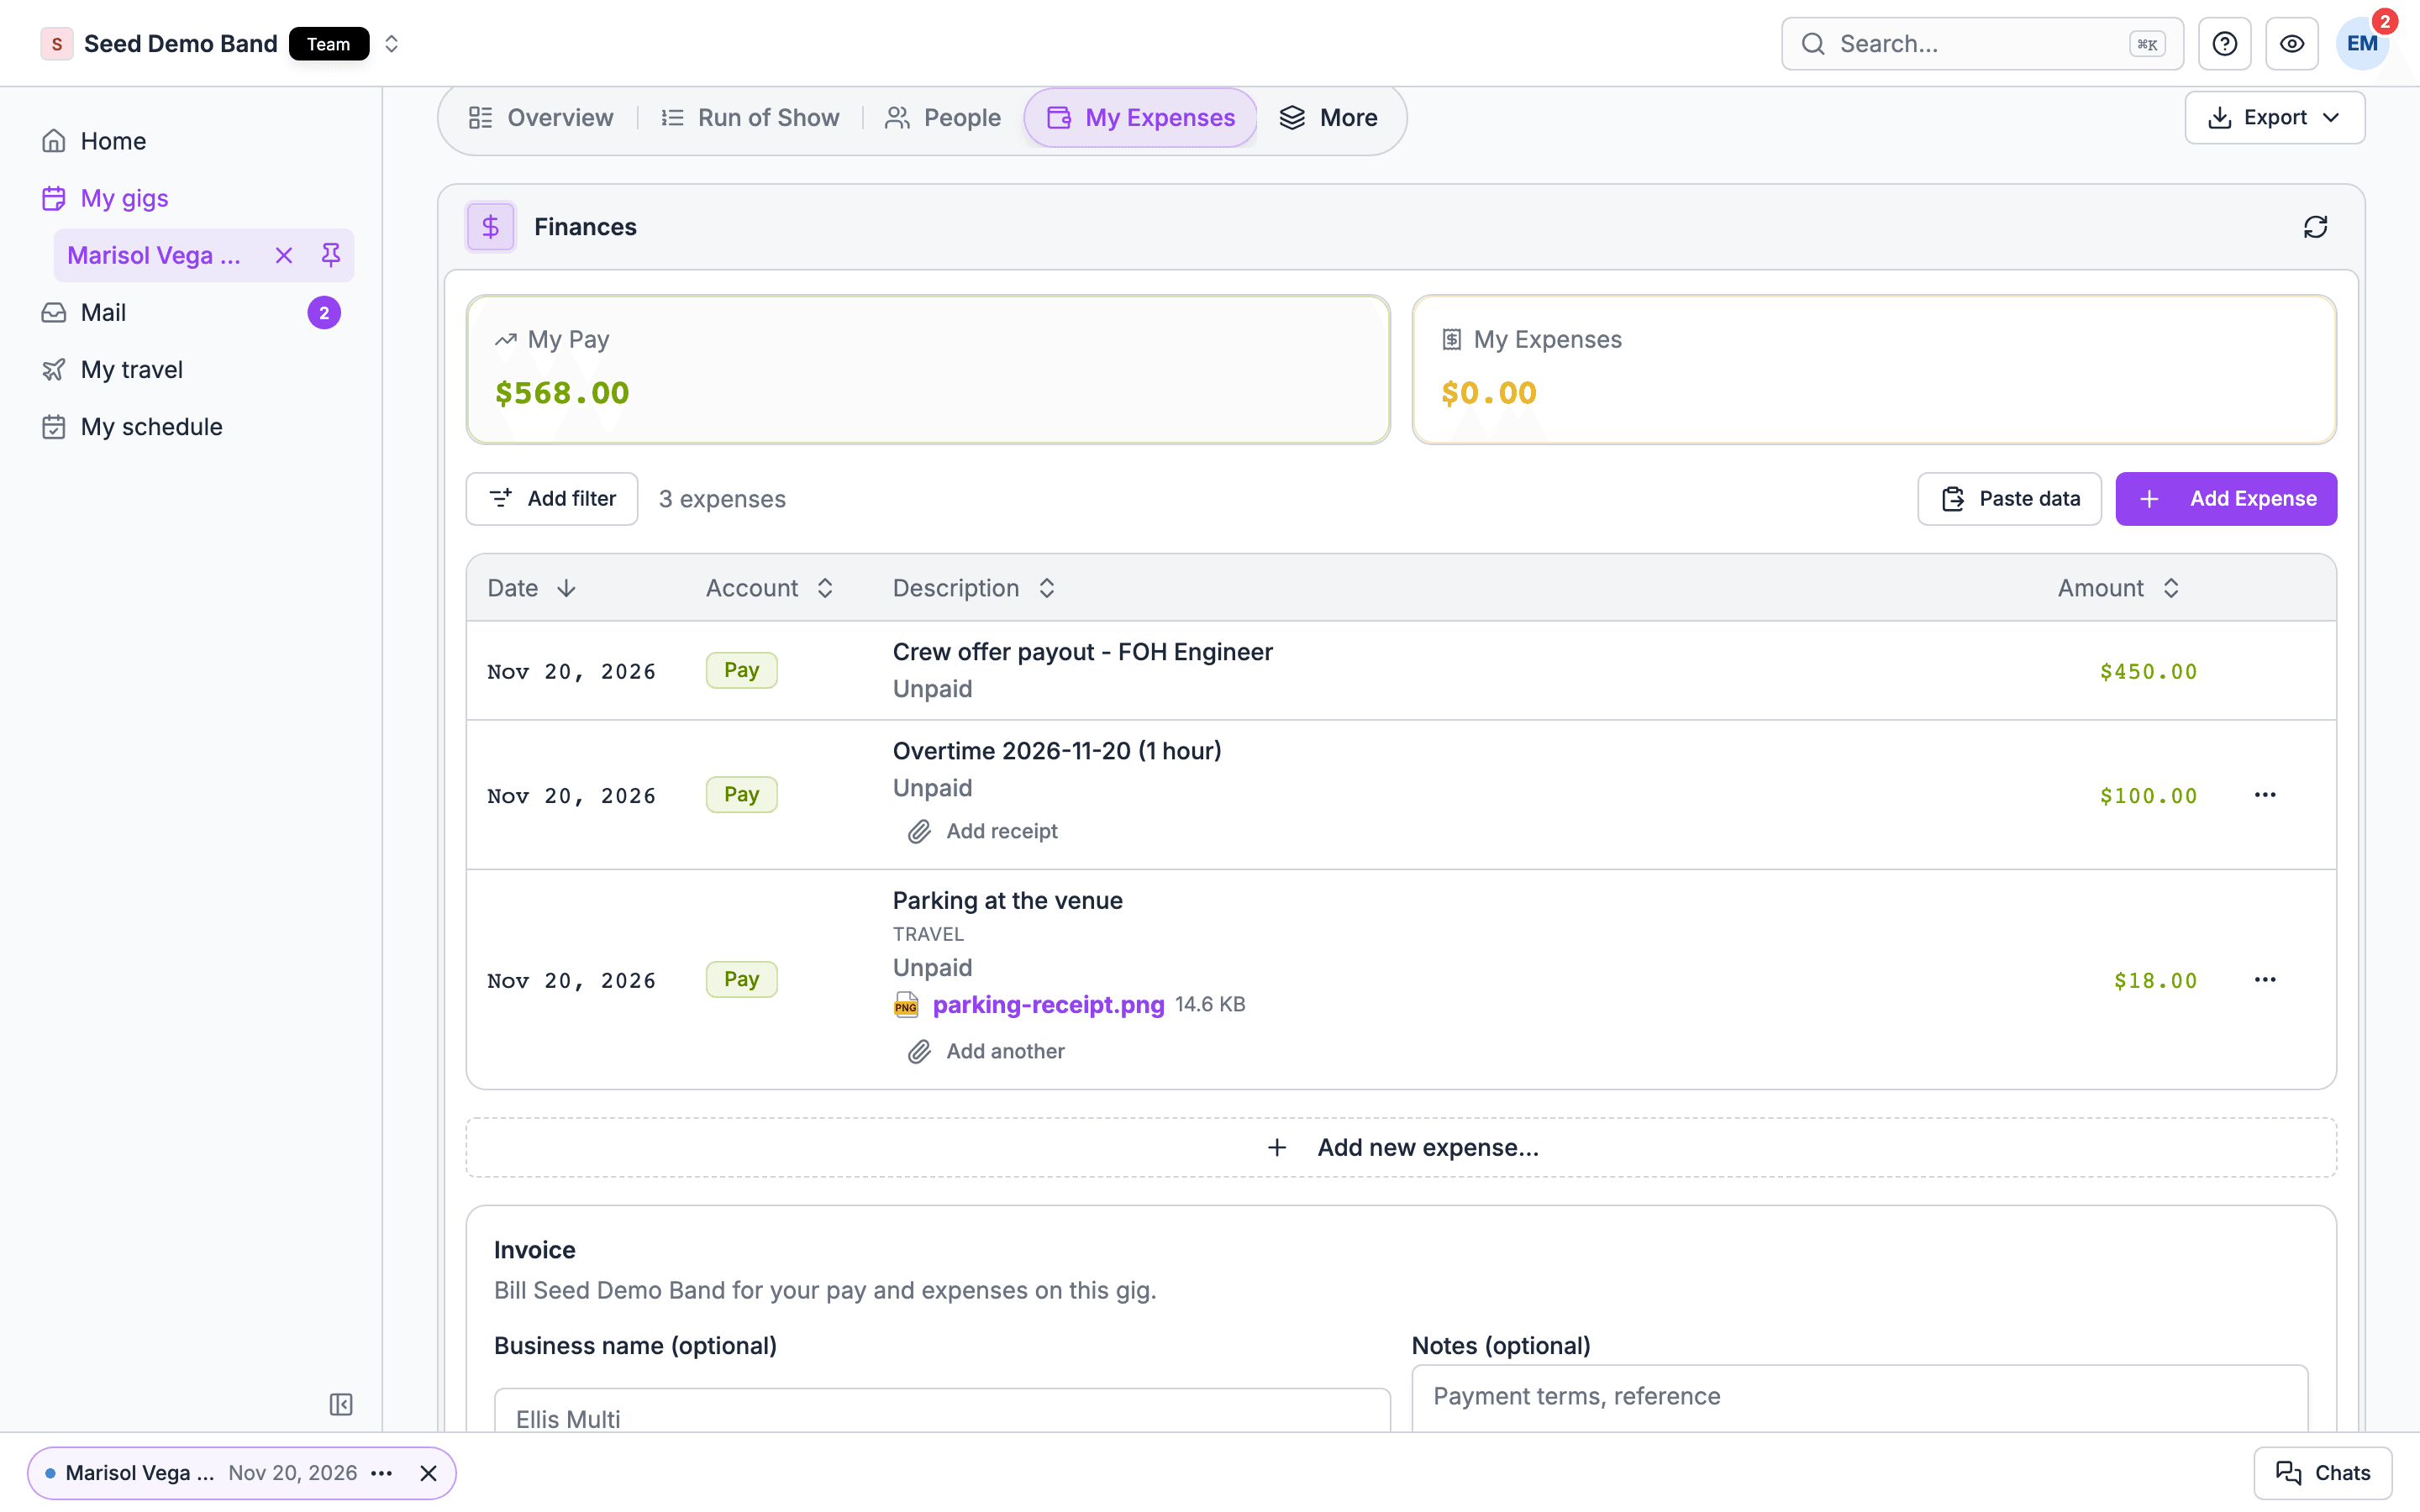
Open the gig and choose its Finances tab. For crew without financial access it’s labeled My Expenses.
2
Add the expense
Choose Add Expense. Enter what it was for, the amount and the date.
3
Attach receipts
Attach receipts before you save.
Receipt rules
- Receipts can be JPEG, PNG, HEIC or PDF files, up to 10 MB each.
- If a receipt fails to upload, the expense stays saved. Retry the upload without submitting the expense twice.
- You can’t submit expenses on an archived gig.
Receipts on the Finances tab
Receipts appear beside the expense on the gig’s Finances tab. Use Add receipt, or Add another on a row that already has one, to attach more.
Once an expense is paid, nobody can remove its receipts.
Pay a reimbursement
A submitted expense is a payable in the gig’s ledger, assigned to the crew member who submitted it. Pay it from the ledger like any other payout: send it through Soundcheck where payouts are set up, or choose Mark as paid… if you paid it another way. See Payouts.There’s no approval step
Soundcheck doesn’t have an approve or reject step for expenses. A submitted expense is simply an unpaid payable until someone pays it or voids it.- To approve it, pay it, or leave it unpaid until you’re ready.
- To reject it, void it on the gig’s Finances tab and tell the crew member why. Voided rows stay visible but can’t be paid.
- Nobody is notified when crew submit an expense. Check the gig’s ledger, or the Payouts tab under Business → Finances, after each show.
Related
The ledger
Where expenses sit with the rest of the gig’s money.
Finances on mobile
Crew pay and expenses in the app.
Finances
Start here for the whole tab.