> ## Documentation Index
> Fetch the complete documentation index at: https://docs.soundchecklive.io/llms.txt
> Use this file to discover all available pages before exploring further.
# Coming from Master Tour / Eventric
> Download Master Tour 3 desktop, export Personnel CSV for crew, and use Eventric help for Tour Details until Mac/Windows
**Master Tour / Eventric** operators move touring data by exporting from the **Master Tour 3 desktop app**, then importing through **Organization → Imports**. There is **no** Master Tour connector. No live sync. No tour-book ingest.
The **web portal cannot create tours or export CSV**. It is for account settings and downloading the desktop app. **Setlists / tour books are PDF, not CSV**. Do not import those as Events or Songs. You cannot ingest Master Tour tour books as files.
Empty-state Imports is **drop-first**. Drop files on the empty state; don't lead with pick-target-first. There are **no** in-product "Coming from Master Tour" cards. There is no Organized / Processing / Queued UI to watch.
**Who can import (web UI):** organization **owner or admin** on the active org, with the `data-import` flag enabled. Prefer in-app target templates when you need a known-good column set.
Shared mapping traps (email hard-required on **Crew**, upload types, ICS rejected): [Coming from another system](/features/imports/coming-from#mapping-traps-every-source).
Walkthrough video is TBD. Until it ships, follow the desktop export steps and screenshot Tips below.
## What you can bring over
| In Master Tour / Eventric | Import target (UI label) | Notes |
| --------------------------------------------------- | ------------------------------------------------- | --------------------------------------------------------------------------------------------------- |
| **Export Personnel** CSV (Gear → Personnel) | **Crew** | Primary roster path (verified on Linux). Map Last Name, First Name, Role, Phone, Email |
| **Tour Details** CSV (File → Export on Mac/Windows) | **Events** (+ **Venues** / **Clients** as needed) | Eventric help names **Dates**, **Venues**, **Cities**, **Promoters** only. No published column list |
| Users CSV / vCard | **Crew** (secondary) | Not the verified crew path. Prefer Export Personnel |
| Setlists / day sheets / tour books (PDF) | n/a | PDF only. Rebuild Songs / Setlists separately if needed |
| Gear / serial / dims (product mention) | n/a until headers confirmed | Do not invent Inventory columns from marketing claims |
## Product path (desktop)
Product UI in this guide is limited to the **web portal download page**, **desktop login**, **desktop dashboard** (gear in header), and the **Linux Personnel save dialog**. Eventric help-center article screenshots are **not** published here as product UI. Use the official help links instead.
### 1. Download Master Tour 3 from the web portal
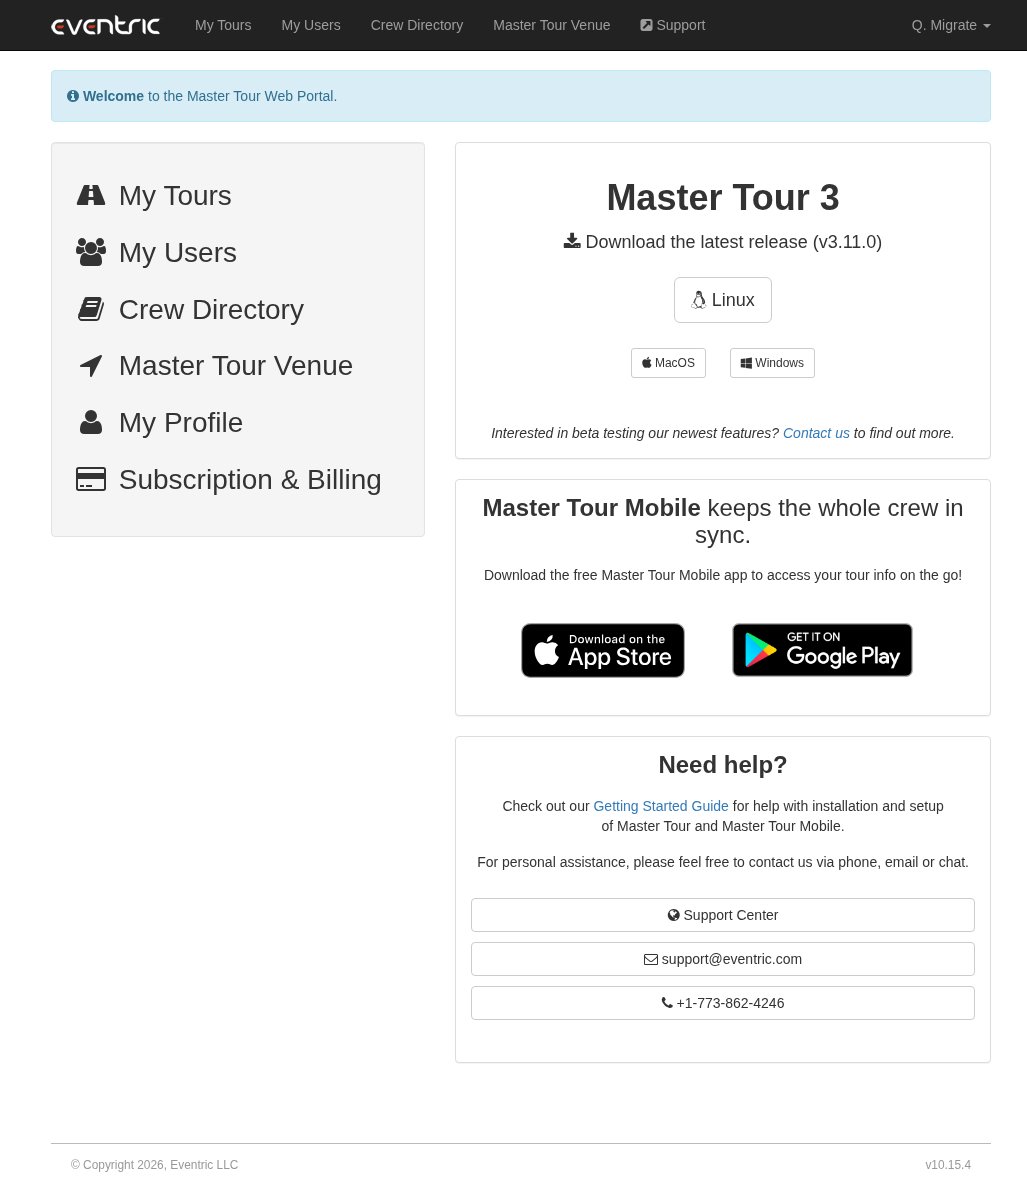
Sign in to the Eventric web portal and download **Master Tour 3** (Linux trial shown here is **v3.11.0**; MacOS and Windows are also offered). There is **no CSV export on the web**.
 ### 2. Sign in to the desktop app
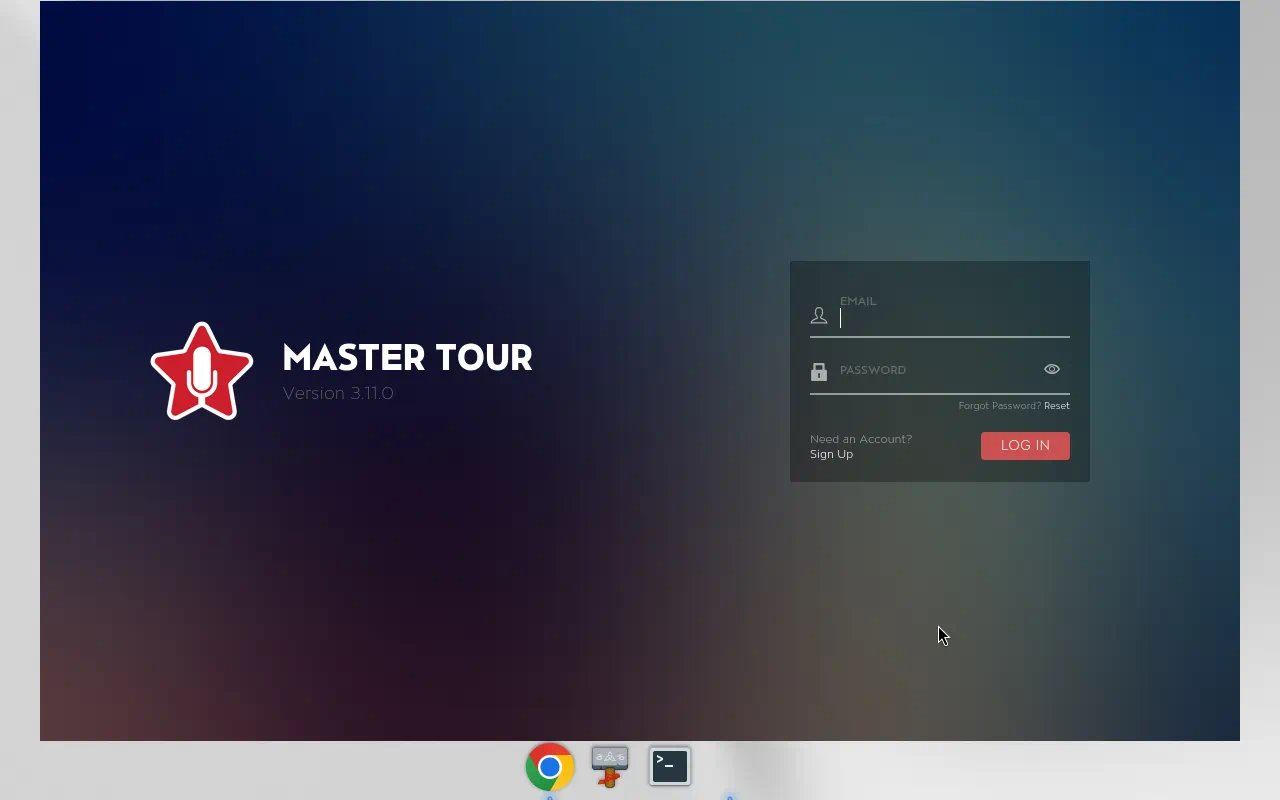
Launch Master Tour 3.11.0 and sign in with your Eventric account.
### 2. Sign in to the desktop app
Launch Master Tour 3.11.0 and sign in with your Eventric account.
 ### 3. Open your org and tour
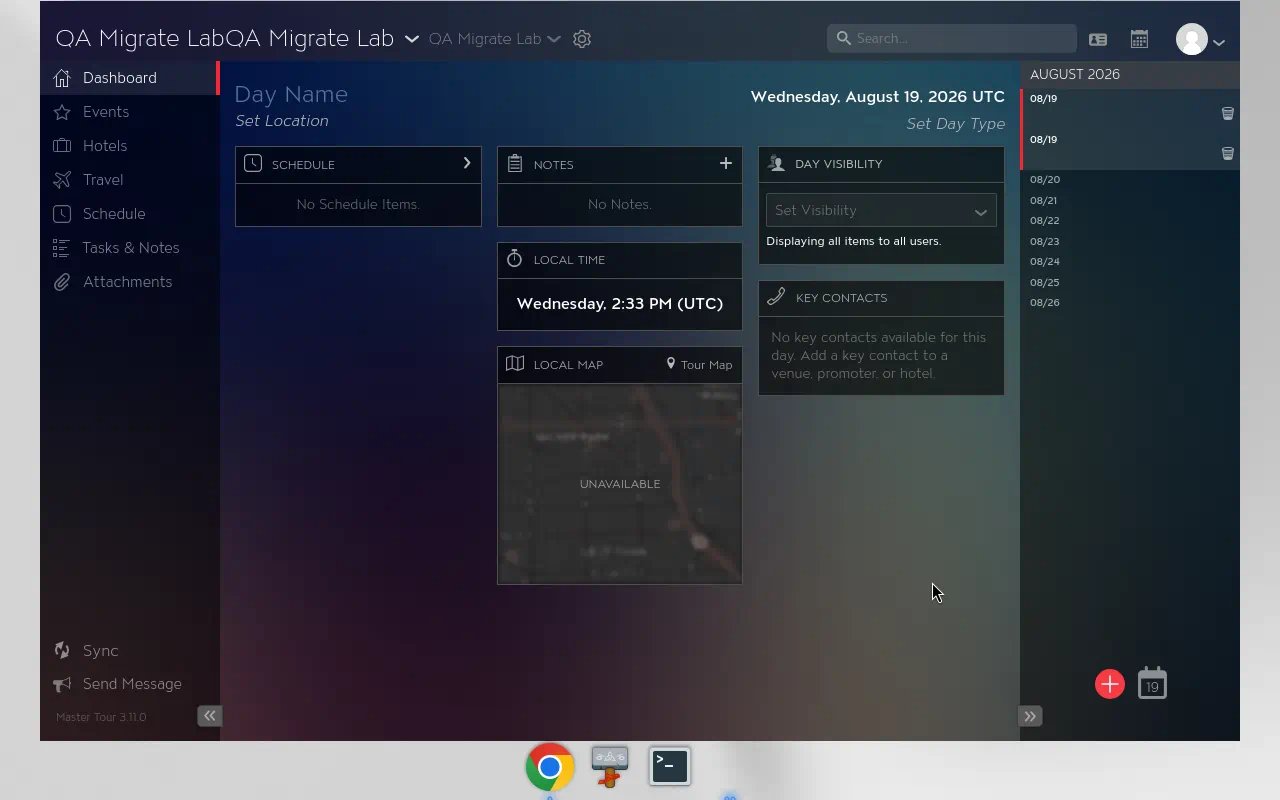
After setup, you land on the desktop dashboard for your organization and tour. The **gear** icon in the header opens org/tour tools, including Personnel export. On Linux there is **no File menu bar**.
### 3. Open your org and tour
After setup, you land on the desktop dashboard for your organization and tour. The **gear** icon in the header opens org/tour tools, including Personnel export. On Linux there is **no File menu bar**.
 ### 4. Export Personnel CSV (crew)
Primary roster path (verified on Linux):
1. Select your **Organization** and **Tour**.
2. Click the **Gear** icon in the header.
3. Open **Personnel**.
4. Click **Export Personnel** and save the CSV.
Official help (text link only; no help-center screenshots in this guide): [How to Export Tour Personnel](https://support.eventric.com/hc/en-us/articles/360046843612-How-to-Export-Tour-Personnel). That page names export groups such as **Personnel Details**, **Per Diem**, **Radio Details**, and **Bus Details**. It does **not** publish a column list.
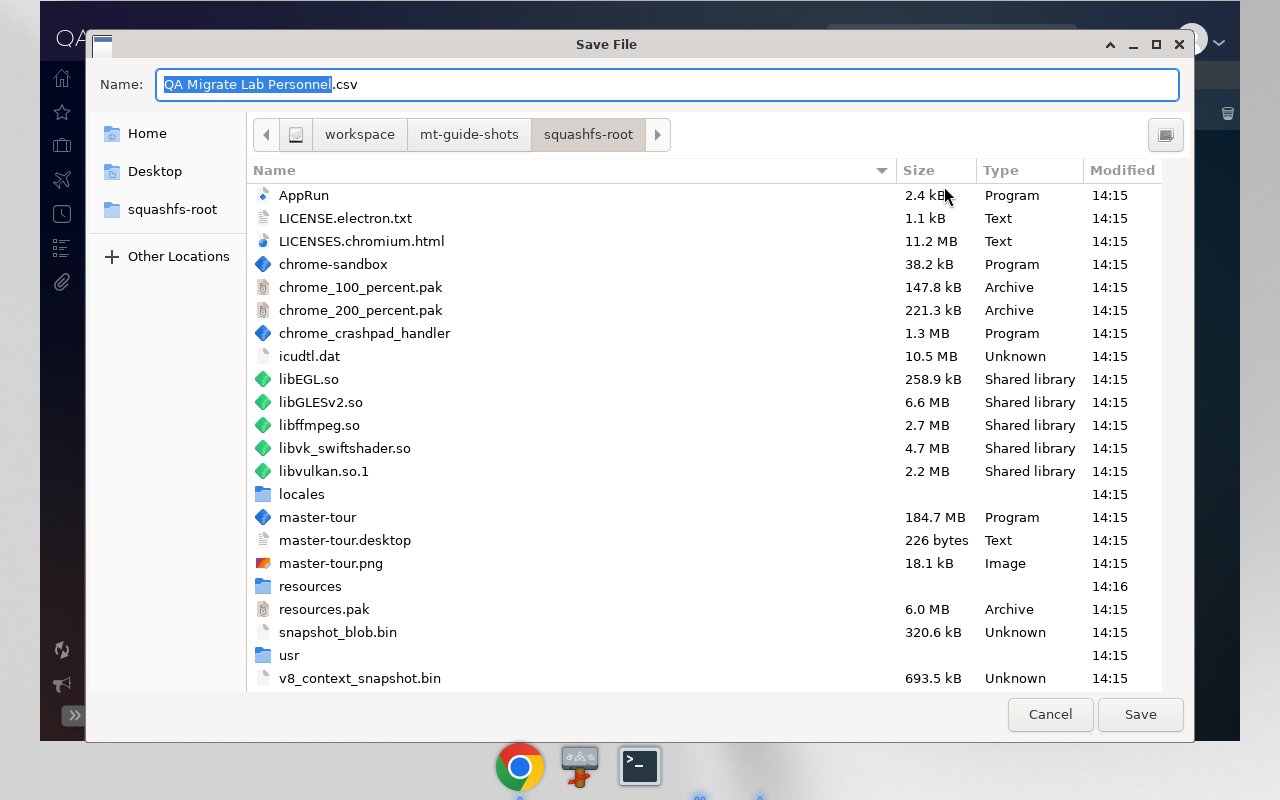
On Linux, after **Export Personnel**, save the file.
### 4. Export Personnel CSV (crew)
Primary roster path (verified on Linux):
1. Select your **Organization** and **Tour**.
2. Click the **Gear** icon in the header.
3. Open **Personnel**.
4. Click **Export Personnel** and save the CSV.
Official help (text link only; no help-center screenshots in this guide): [How to Export Tour Personnel](https://support.eventric.com/hc/en-us/articles/360046843612-How-to-Export-Tour-Personnel). That page names export groups such as **Personnel Details**, **Per Diem**, **Radio Details**, and **Bus Details**. It does **not** publish a column list.
On Linux, after **Export Personnel**, save the file.
 PDF fallback: [How to Print Tour Personnel](https://support.eventric.com/hc/en-us/articles/360047472651-How-to-Print-Tour-Personnel). Rebuild a Crew sheet by hand if you lack the CSV.
### Map Personnel into Crew
For import, map at least:
* **Last Name** → Crew last name
* **First Name** → Crew first name
* **Role** → Crew position
* **Phone** → Crew invite phone
* **Email** → Crew invite email (required)
Skip Per Diem / Radio / Bus and other tour-ops columns you do not need. Put extras you keep into the source sheet or leave unmapped. Do **not** invent Bus / Per Diem / Radio column names from those group titles. Do **not** list immigration or document fields in your mapped sheet for this guide.
**Email is hard-required**. Phone-only rows fail. Dedup is email; there is **no** member `external_id` column in the spreadsheet wizard today.
Some personnel exports include rows with an **empty Email**. Those rows **fail** Crew import. Map Last Name, First Name, Role, Phone, and Email; skip extra tour-ops columns; do not treat a sample Personnel file as a drop-in fixture.
Screenshot placeholder: Soundcheck Organization → Imports map step with Personnel **Email → email** (and Role → position). Drop-first empty state, not an older pick-target-first chrome.
### Users CSV / vCard (secondary people export)
Eventric also documents a **Users** export (CSV / vCard): [How to Export Users](https://support.eventric.com/hc/en-us/articles/360047331051-How-to-Export-Users). Treat that as a **secondary people export only**. Do **not** replace **Gear → Personnel → Export Personnel** as the verified crew path for this guide.
## Tour Details CSV (events / venues / promoters)
Official path (Eventric help): **File → Export → Export Tour Details As CSV**, then set **From** / **To** dates and save.
Official help: [How to Export Tour Details](https://support.eventric.com/hc/en-us/articles/360046845392-How-to-Export-Tour-Details). That page names **Dates**, **Venues**, **Cities**, and **Promoters** only. It does **not** publish a column list. Eventric only names those four; do not invent Tour Details columns.
* **Date range is a gotcha**. Confirm the export covers the tour days you intend before you map.
* On **Linux**, the desktop app still has **no File menu bar**, so **File → Export** is not available there. Until you export from **Mac or Windows**, follow the Eventric help link above.
When you have that CSV, map it into **Events**, plus **Venues** and **Clients** (promoters) as needed. Accepted uploads are `.xlsx` / `.csv` / `.tsv` / `.txt` only. Unknown columns stay unmapped. Do not invent header names for docs or templates.
Screenshot placeholder: Eventric help article title only (link), or Mac/Windows File → Export Tour Details when you have a real capture. Do not invent Tour Details column names in the Frame.
## Recommended zip / sheet layout
If you pack a season folder or ZIP for yourself, **extract it first**. The importer does **not** unpack ZIP archives. Upload the supported files individually (`.xlsx` / `.csv` / `.tsv` / `.txt`). A Soundcheck **workspace UEF zip** is a different path: restore that from **Organization → Data**, not by dropping the archive on Imports.
```
season-master-tour/
01-crew-personnel.csv # Gear → Export Personnel
02-venues.csv # optional split from Tour Details
03-clients-promoters.csv # optional split
04-events-tour-details.csv # Mac/Windows Tour Details CSV
05-songs-setlists/ # optional BYO - not from MT PDF tour books
README.txt # OS used; date range; tour name
```
Drop the individual CSVs on **Organization → Imports**. Load order: **Crew → Venues → Clients → Songs → Setlists → Events**.
## Master Tour-specific mapping notes
* Map Personnel to Last Name, First Name, Role, Phone, Email.
* Do not promise CCLI, charts, plan order, or booked-roles coming across.
* Do not invent Tour Details columns beyond Dates / Venues / Cities / Promoters as named areas.
* Touring practice CSVs under `docs/sample-imports/customers/touring-artist/` use **sample-import headers**, not a native Master Tour export. You must map.
Full shared traps: [Coming from another system](/features/imports/coming-from#mapping-traps-every-source).
## Import order
1. **Crew** from **Export Personnel** CSV (or a sheet rebuilt from the PDF fallback)
2. **Venues** / **Clients** when you want directory matches before gigs
3. **Songs** / **Setlists** only if you BYO (not from PDF tour books)
4. **Events** from Tour Details CSV (when you have it from Mac/Windows)
Canonical product order: **Crew → Venues → Clients → Songs → Setlists → Events** (Inventory and Leads when you need them).
## Import path
1. Open **Organization → Imports**. Drop files on the empty state (drop-first). Review detected targets, map columns (especially **Email** on Crew), preview, commit.
2. Save a mapping **template** once Personnel (and later Tour Details) headers are mapped.
3. After commit: open **Gigs**, ask people to accept invitations, spot-check venues / clients, re-import once (expect **0 new** rows).
Live chrome is **Organization → Imports**. `/assets?tab=imports` is a route alias to the same Imports page (not an Assets tab in the sidebar). `/imports` redirects only. Older bookmark: **Settings → Organization → Imports** (`/settings/organization/imports`). On some builds (including DEV), that Settings path can bounce an owner to `/gigs` instead of the importer. Treat that as a product gap, not a docs typo.
No Google Sheets connector. No MCP connect URL in this guide. Follow the Eventric help links above for Personnel and Tour Details (link-only; no help-center product shots).
Partial commit (some rows written when others fail) is shipping via PR **1446** on DEV. Hedge production: until your environment shows it, one bad row can still block the whole file.
Full wizard: [Operator data imports](/features/imports/overview). Season recipe: [Importing your season](/faq/workflows/importing-your-season).
## Practice samples
Touring-artist practice files: `docs/sample-imports/customers/touring-artist/` (tour personnel, routing, setlist).
These are sample-shaped files for practice, not a Master Tour native export drop-in. Map columns; do not treat them as Eventric output.
## Related
Hub for Planning Center, Back On Stage, Master Tour, Stagera, and LASSO / Shoflo
Organization → Imports wizard, targets, and permissions
PDF fallback: [How to Print Tour Personnel](https://support.eventric.com/hc/en-us/articles/360047472651-How-to-Print-Tour-Personnel). Rebuild a Crew sheet by hand if you lack the CSV.
### Map Personnel into Crew
For import, map at least:
* **Last Name** → Crew last name
* **First Name** → Crew first name
* **Role** → Crew position
* **Phone** → Crew invite phone
* **Email** → Crew invite email (required)
Skip Per Diem / Radio / Bus and other tour-ops columns you do not need. Put extras you keep into the source sheet or leave unmapped. Do **not** invent Bus / Per Diem / Radio column names from those group titles. Do **not** list immigration or document fields in your mapped sheet for this guide.
**Email is hard-required**. Phone-only rows fail. Dedup is email; there is **no** member `external_id` column in the spreadsheet wizard today.
Some personnel exports include rows with an **empty Email**. Those rows **fail** Crew import. Map Last Name, First Name, Role, Phone, and Email; skip extra tour-ops columns; do not treat a sample Personnel file as a drop-in fixture.
Screenshot placeholder: Soundcheck Organization → Imports map step with Personnel **Email → email** (and Role → position). Drop-first empty state, not an older pick-target-first chrome.
### Users CSV / vCard (secondary people export)
Eventric also documents a **Users** export (CSV / vCard): [How to Export Users](https://support.eventric.com/hc/en-us/articles/360047331051-How-to-Export-Users). Treat that as a **secondary people export only**. Do **not** replace **Gear → Personnel → Export Personnel** as the verified crew path for this guide.
## Tour Details CSV (events / venues / promoters)
Official path (Eventric help): **File → Export → Export Tour Details As CSV**, then set **From** / **To** dates and save.
Official help: [How to Export Tour Details](https://support.eventric.com/hc/en-us/articles/360046845392-How-to-Export-Tour-Details). That page names **Dates**, **Venues**, **Cities**, and **Promoters** only. It does **not** publish a column list. Eventric only names those four; do not invent Tour Details columns.
* **Date range is a gotcha**. Confirm the export covers the tour days you intend before you map.
* On **Linux**, the desktop app still has **no File menu bar**, so **File → Export** is not available there. Until you export from **Mac or Windows**, follow the Eventric help link above.
When you have that CSV, map it into **Events**, plus **Venues** and **Clients** (promoters) as needed. Accepted uploads are `.xlsx` / `.csv` / `.tsv` / `.txt` only. Unknown columns stay unmapped. Do not invent header names for docs or templates.
Screenshot placeholder: Eventric help article title only (link), or Mac/Windows File → Export Tour Details when you have a real capture. Do not invent Tour Details column names in the Frame.
## Recommended zip / sheet layout
If you pack a season folder or ZIP for yourself, **extract it first**. The importer does **not** unpack ZIP archives. Upload the supported files individually (`.xlsx` / `.csv` / `.tsv` / `.txt`). A Soundcheck **workspace UEF zip** is a different path: restore that from **Organization → Data**, not by dropping the archive on Imports.
```
season-master-tour/
01-crew-personnel.csv # Gear → Export Personnel
02-venues.csv # optional split from Tour Details
03-clients-promoters.csv # optional split
04-events-tour-details.csv # Mac/Windows Tour Details CSV
05-songs-setlists/ # optional BYO - not from MT PDF tour books
README.txt # OS used; date range; tour name
```
Drop the individual CSVs on **Organization → Imports**. Load order: **Crew → Venues → Clients → Songs → Setlists → Events**.
## Master Tour-specific mapping notes
* Map Personnel to Last Name, First Name, Role, Phone, Email.
* Do not promise CCLI, charts, plan order, or booked-roles coming across.
* Do not invent Tour Details columns beyond Dates / Venues / Cities / Promoters as named areas.
* Touring practice CSVs under `docs/sample-imports/customers/touring-artist/` use **sample-import headers**, not a native Master Tour export. You must map.
Full shared traps: [Coming from another system](/features/imports/coming-from#mapping-traps-every-source).
## Import order
1. **Crew** from **Export Personnel** CSV (or a sheet rebuilt from the PDF fallback)
2. **Venues** / **Clients** when you want directory matches before gigs
3. **Songs** / **Setlists** only if you BYO (not from PDF tour books)
4. **Events** from Tour Details CSV (when you have it from Mac/Windows)
Canonical product order: **Crew → Venues → Clients → Songs → Setlists → Events** (Inventory and Leads when you need them).
## Import path
1. Open **Organization → Imports**. Drop files on the empty state (drop-first). Review detected targets, map columns (especially **Email** on Crew), preview, commit.
2. Save a mapping **template** once Personnel (and later Tour Details) headers are mapped.
3. After commit: open **Gigs**, ask people to accept invitations, spot-check venues / clients, re-import once (expect **0 new** rows).
Live chrome is **Organization → Imports**. `/assets?tab=imports` is a route alias to the same Imports page (not an Assets tab in the sidebar). `/imports` redirects only. Older bookmark: **Settings → Organization → Imports** (`/settings/organization/imports`). On some builds (including DEV), that Settings path can bounce an owner to `/gigs` instead of the importer. Treat that as a product gap, not a docs typo.
No Google Sheets connector. No MCP connect URL in this guide. Follow the Eventric help links above for Personnel and Tour Details (link-only; no help-center product shots).
Partial commit (some rows written when others fail) is shipping via PR **1446** on DEV. Hedge production: until your environment shows it, one bad row can still block the whole file.
Full wizard: [Operator data imports](/features/imports/overview). Season recipe: [Importing your season](/faq/workflows/importing-your-season).
## Practice samples
Touring-artist practice files: `docs/sample-imports/customers/touring-artist/` (tour personnel, routing, setlist).
These are sample-shaped files for practice, not a Master Tour native export drop-in. Map columns; do not treat them as Eventric output.
## Related
Hub for Planning Center, Back On Stage, Master Tour, Stagera, and LASSO / Shoflo
Organization → Imports wizard, targets, and permissions